Overview
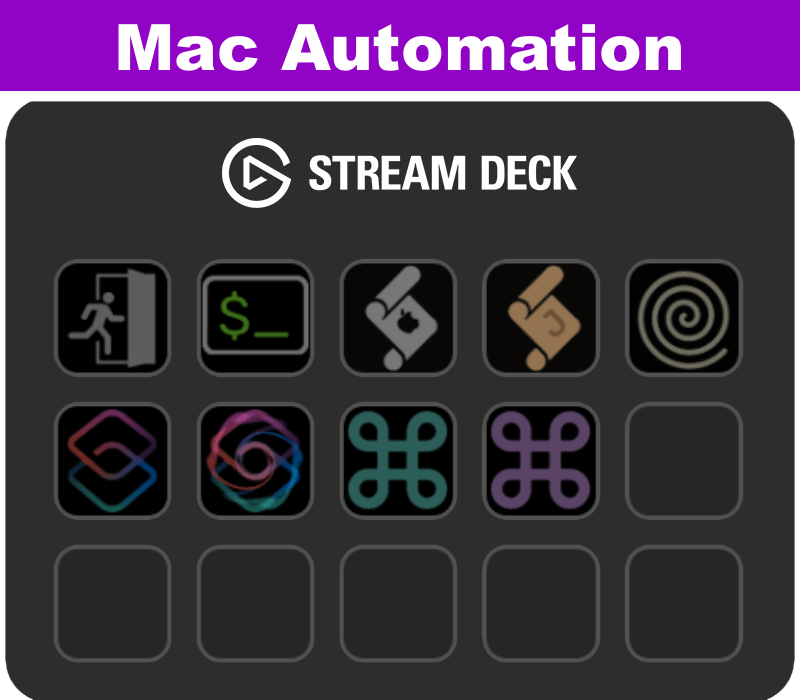
Mac Automation is a free actions plugin for the Elgato Stream Deck. It brings together a number of useful actions for those who like to automate things on their Mac. If you have a Mac and a Stream Deck, then you are probably one of those people.
You may already have plugins that provide some of this functionality. This plugin is intended to be complementary, so if everything works for you already, do not feel compelled to swap. Plugins can be quite opinionated and this plugin perhaps just offers some alternatives and they may be for you. They may not. It’s all good. Hopefully, there will be at least one or two actions which you will find useful.
Download from the Official Elgato Marketplace:

This Plugin is Free
This is a free plugin, but if you like it and want to say thanks, I am a coffee lover and you can always buy me a coffee via the button below. As a bonus, you can also follow me there to get monthly updates on what I am getting up to which tends to include quite a bit of Mac-based automation.

Mac Automation Actions
The plugin currently supports the following actions:
- Run Open
- Run Shell Command
- Run AppleScript (Script)
- Run JXA (Script)
- Simplified HTTP Request (curl)
- Structured HTTP Request (curl)
- Run Shortcut (Manual)
- Run Shortcut (From List)
- Run KM Macro (Manual)
- Run KM Macro (From List)
There are some further details below on each of these actions along with some examples of how they can be utilised. In many cases you would have to substitute something local to your machine to produce a working example of your own, but hopefully, they illustrate some of the things you could do.
Run Open
This action is a generic opener. It uses the power of the command line open command to process the specified input.
Notably, using this to trigger URLs works around the restrictions introduced by Elgato on the Website action when they introduced the default browser option.
Examples
The following examples show the sorts of settings you might use with this action.
Preview Image
- Set Item to
/System/Library/Desktop Pictures/iMac Blue.heic
Open a Website in the Default Browser
- Set item to URL -
https://www.bbc.co.uk/news
Run Shortcut via URL
- Set item to a launch URL -
shortcuts://run-shortcut?id=EADDFD7F-6AFC-4504-880C-BD81FE0699BA
Run Shell Command
The Shell Command action can be used to run any arbitrary command line instruction. This could be a terminal command or even a path to a shell script (that has been set as executable. This latter one is what I would recommend for non-trivial commands as you can run it from other tools too, and it makes it super easy to debug and build more complex automations.
Examples
The following examples show the sorts of settings you might use with this action.
Play Audio File
- Set Command to
afplay /System/Library/Sounds/Sosumi.aiff
Call a Script File With Arguments
- Set Command to
'/Users/stephen/Library/Mobile Documents/com~apple~CloudDocs/Scripts/speech/read_args_aloud.sh' foo and bar
Run AppleScript (Script)
This action allows you to run AppleScript. Not arbitrary AppleScript, only AppleScript saved to file.
The action includes a button icon for an open dialog that will let you select an uncompiled script. For a compiled script you can enter the path manually, including pasting it in from the clipboard.
If you really want to run arbitrary AppleScript, there is at least one plugin that does that explicitly, but I would also note that you could run it via osascript -e in the Run Shell Command action.
Run JXA (Script)
This action allows you to run JavaScript for Automation (JXA). Not arbitrary JXA, only JXA saved to file.
The action includes a button icon for an open dialog that will let you select an uncompiled script. For a compiled script you can enter the path manually, including pasting it in from the clipboard.
If you really want to run arbitrary JXA, there is at least one plugin that does that explicitly, but I would also note that you could run it via osascript -l JavaScript -e in the Run Shell Command action.
Simplified HTTP Request (curl)
This action uses the curl (Client URL) utility to carry out some data transfer. I often use it to trigger API end points or grab the content of a web page for processing. It is the former that is probably of most use for this action. The action allows you to pass a URL to the curl utility, along with any additional parameters you might want. Selecting the Security option will utilise the curl command’s -k flag to ignore certificate errors.
Unlike the Run Open action, this is not opening the URLs in your browser, but rather, it opens them in the background.
Examples
The following examples show the sorts of settings you might use with this action.
Trigger a Local HTTP Service
- Set URL to the end point URL -
http://hook.local:8123/hooks/litratoggle
Trigger a Local HTTPS Service Insecurely
I sometimes end up setting up services on my home network that run over HTTPS, are isolated from the open Internet, but that I also then don’t put a security certificate on. curl allows you to ignore certificate errors for these sorts of scenarios.
- Set URL to the end point URL -
https://hook.local:8321/hooks/litratoggle - Set ‘TLS/SSL (Ignore SSL certificate errors)’ to be enabled
Structured HTTP Request (curl)
This is a more advanced version of the Simplified HTTP Request (curl) action. It provides options on the configuration page to set the URL, method, content type, headers, body timeout, and the option to ignore security certificates.
Examples
Trigger a Local HTTPS Service Insecurely
This example from the simplified version of the action needs a little extra configuration.
- Set URL to the end point URL -
https://hook.local:8321/hooks/litratoggle - Set Method to
GET - Set Content-Type to
(none) - Set ‘TLS/SSL (Ignore SSL certificate errors)’ to be enabled
Posta a Call to Webhook.site
Webhook.site is a website that developers can use to test webhook payloads. You can send such a payload using this action. When you access the site in your browser you will be given a unique URL to use - e.g. https://webhook.site/6b02a562-076d-4b18-bbc5-560ac245273e. When you post to that URL the responses will be shown on the page.
You can set up a simple push request as follows:
- Set URL to your unique URL from the website - e.g.
https://webhook.site/6b02a562-076d-4b18-bbc5-560ac245273e - Set Method to
POST - Set Content-Type to
(none) - Set Headers to
X-Demo: Stream Deck - Set Body to the following JSON structure:
{
  "website" : "https://streamdeckstash.thoughtasylum.com",
  "plugin" :"Mac Automation",
  "rating" : "⭐⭐⭐⭐⭐"
}
Run Shortcut (Manual)
The “Manual” version of the run shortcut action lets you just enter the name or the ID of the shortcut.
As well as a name, Shortcuts also have a unique ID (a v4 UUID) that does not change if you rename a shortcut. If you use the name in an action and rename the shortcut you will need to update the action. If you use the shortcut ID you will not.
One quick way to get the ID is to use this ZSH one-liner that will put the ID on your clipboard when you enter (it prompts you on run) a filter string, Just make sure the filter string is enough to uniquely identify the shortcut by name.
print -n "Filter: "; read filter; shortcuts list --show-identifiers | grep "$filter" | sed -En 's/.*\(([A-Fa-f0-9-]{36})\)$/\1/p' | tee >(pbcopy)Alternatively, if you are an Alfred app user, you might want to check out Bypass, my Alfred workflow for Apple Shortcuts that lets you grab the ID of a Shortcuts shortcut right from Alfred.
You can optionally specify a string to be passed as input to the shortcut. There is no need to wrap these in quotes - the content will just be passed in; but your shortcut must be designed to make use of such input otherwise it will have no effect.
Examples
The following examples show the sorts of settings you might use with this action.
Shortcut by Name
- Set Shortcuts ID/Name to
Say Bonjour - Optionally set the shortcut parameter to
mon ami
Shortcut by ID
- Set Shortcuts ID/Name to
EADDFD7F-6AFC-4504-880C-BD81FE0699BA - Optionally set the shortcut parameter to
à tous
Run Shortcut (From List)
The “From List” version of the run shortcut action lets you just select a shortcut from a drop down list of all of the available shortcuts. The list supports filtering and as you type into the list of available shortcuts it will reduce the list of matching shortcuts making it quick to select it if you perhaps are not 100% sure on the name.
The action is storing and using the shortcut ID behind the scenes, so if you rename your shortcut, the action should continue to work, because the unique ID does not change.
You can optionally specify a string to be passed as input to the shortcut. There is no need to wrap the string(s) in quotes - the content will just be passed in; but your shortcut must be designed to make use of such input otherwise it will have no effect.
Examples
The following examples show the sorts of settings you might use with this action.
Run a Shortcut
- Set Shortcuts ID/Name to “Say Bonjour”
- Optionally set the shortcut parameter to
je suis ton mac
Run Keyboard Maestro Macro (Manual)
The “Manual” version of the run Keyboard Maestro macro action lets you just enter the name or the ID of the Keyboard Maestro macro. Both of these are easily accessible within Keyboard Maestro - the ID being found at Edit > Copy As > Copy UUID.
Once again, if you are an Alfred app user, you might want to check out Conductor, my Alfred workflow for Keyboard Maestro that lets you grab the ID of a Keyboard Maestro macro right from Alfred.
You can optionally specify a string to be passed as input to the macro. There is no need to wrap these in quotes - the content will just be passed in; but your macro must be designed to make use of such input otherwise it will have no effect. The input will be placed in the TriggerValue token of the macro.
Examples
The following examples show the sorts of settings you might use with this action.
Run Macro by ID
- Set the Macro ID/Name to
899699B5-A21D-4042-A0B0-3D5A29E73D83
Run Macro by Name
- Set the Macro ID/Name to
SHEEP - Set the Macro Parameter to
Black
Example Setup
Stream Deck Entry
Here we are specifying the ID of a Keyboard Maestro macro and passing in some text.
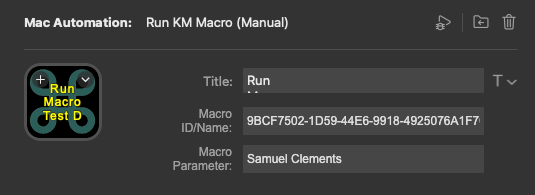
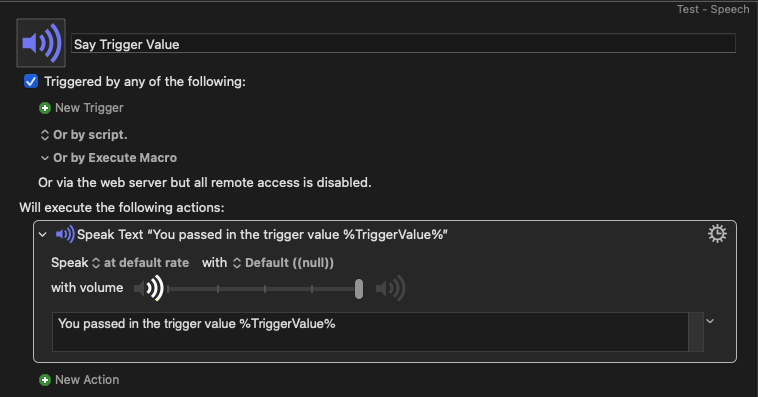
The matching Keyboard Maestro macro then utilises the text via the TriggerValue token to speak the input aloud.
Run Keyboard Maestro Macro (From List)
The “From List” version of the run Keyboard Maestro macro action lets you just select a macro from a drop down list of all of the available macros. The list supports filtering and as you type into the list of available macros it will reduce the list of matching macros making it quick to select it if you perhaps are not 100% sure on the name.
The action is storing and using the macro ID behind the scenes, so if you rename your macro, the action should continue to work, because the unique ID does not change.
You can optionally specify a string to be passed as input to the macro. There is no need to wrap the string(s) in quotes - the content will just be passed in; but your shortcut must be designed to make use of such input otherwise it will have no effect. The input will be placed in the TriggerValue variable of the macro.
Examples
The following examples show the sorts of settings you might use with this action.
Run a Macro
- Select the
SHEEPmacro from the list - Set the Macro Parameter to
White
Example Setup
Stream Deck Entry
Here we specify the macro and pass in some text.
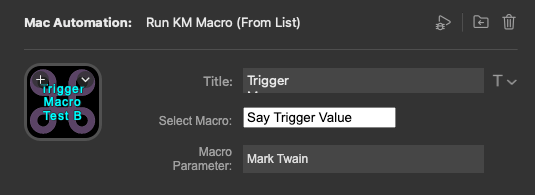
The matching Keyboard Maestro macro then utilises the text via the TriggerValue token to speak the input aloud.
Change Log
- v1.2.1 - 23 January 2026
- Improved parameter parsing and handling for the open and script-based actions (AppleScript and JXA).
- v1.2.0 - 19 January 2026
- Fixed encoding issue in the parameter specification for Keyboard Maestro macro actions. Now supports content such as emoji.
- Fixed a logic issue in the curl action.
- Renamed “HTTP Request (curl)” to “Simplified HTTP Request (curl)”.
- Revised the configuration page for the Simplified HTTP Request (curl) action to provide more explicit advice and guidance.
- Added new Structured HTTP Request (curl) action.
- v1.1.0 - 15 January 206
- Rewrite of dropdown list in user interface for the Run Keyboard Maestro Macro (From List) action. It now only displays active macros in the list and can also deal with populating the list from ‘very large’ Keyboard Maestro macro libraries. Inactive actions could still be triggered by specifying the name/ID in the Run Keyboard Maestro Macro (Manual) action.
- If anyone does reach this limit in future, try pruning your library a little and if that is impractical, please raise an issue for support (see issues section at the bottom of this page).
- Updates for Elgato DRM compatibility - minimum Stream Deck version of 6.9 or higher, and manifest SDK version of 3 or higher.
- Rewrite of dropdown list in user interface for the Run Keyboard Maestro Macro (From List) action. It now only displays active macros in the list and can also deal with populating the list from ‘very large’ Keyboard Maestro macro libraries. Inactive actions could still be triggered by specifying the name/ID in the Run Keyboard Maestro Macro (Manual) action.
- v1.0.2 - 14 July 2025
- First official release to the Elgato Marketplace.
- Removal of default Windows compatibility in plugin manifest. This is a Mac only plugin.
- v1.0.1
- Improved legibility of JXA action icon.
- v1.0.0
- Exit from public beta to public release.
- v0.3.0
- Insecure
curlmodifications and consolidation (public beta)
- Insecure
- v0.2.0
- User interface formatting improvements (public beta).
- v0.1.0
- Initial release (public beta).
Support
Support issues and queries such as bug reports, enhancement requests, and support questions are managed via an issue tracker hosted on GitHub. Currently open bugs are listed below. If you are experiencing an issue, but do not see it listed below, please create a new issue.